


You don’t have space in the garden? You don't want to risk clumsy neighbors seeing you? Or simply indoor growing scares you because you think it's complicated and expensive? Then this post will help you clarify some of your doubts and have a slightly clearer idea about it.
Indoor cultivation means that we do it within the walls of our home and therefore safer from prying eyes. This type of cultivation, however, has some essential points that we cannot overlook if we want to have a healthy and abundant harvest. Let's go see them.
The first thing we have to choose carefully is the grow room, which is the room where we will keep our plants. It can easily be an inside room in the house, a corner of the basement, a wardrobe or a grow box. The choice is up to you. If we choose one of the first options, however, we should be careful that the lighting, the size of the room and the ventilation are the correct ones (we will see these points a little further on). The choice of a grow box, on the other hand, makes everything a little easier because his structure is developed in the respect of these important factors. On the market there are several boxes of different heights, widths and lengths.
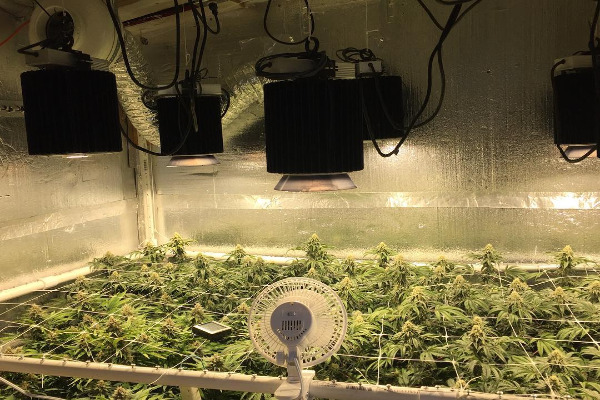
Photo from @elcultivar
We advise you to start with a measure of at least 100 cm wide, 100 cm long and 200 cm high. With these measures we can have a wide choice in the lighting and temperature control systems; also, we could have a wide range of accessories to always have a good cultivation, despite the different climatic conditions that the seasons normally give us.
Once the grow room has been chosen, we can devote ourselves to the search for the correct lighting. Unlike
outdoor cultivation, where the light is proportioned by the sun, we would need suitable lamps here.
The first point to be clarified on these is that it is not the accessory in which we want to save money, since it
is the most important thing to give life to an abundant harvest. And since in the market you will find different
types of lamps and this could be confusing for you, let's distinguish the different choices.
For the first phase
of our plant, the growth, we would need a white or a blue lamp that would give us 6 hours of darkness and
18 hours of light. For this phase we can use HM, CFL, LED or Fluorescent systems.
For flowering instead, an orange or a red lamp are the ones used, and we should alternate 12 hours of light with 12 hours of darkness. The most used systems for this phase are: HPS, HPS + HM and LED. If you have chosen autoflowering plants, the hours of light have to increase to 20 and the hours of darkness will go down at 4. Using white light during growth and orange light from the beginning of flowering to harvest.
We already have our own box and the correct lighting, but without an adequate ventilation, the proliferation of different insects and molds will be our next problem. To avoid this unpleasant situation, we should provide ourselves with three essential accessories: an internal fan, an air extractor and an extractor fan. A simple fan inside the box will move the air inside and will help us maintain the right temperature.
The extractor, as its name implies, will extract the heat accumulated in the box, reducing humidity and helping to renew the air inside the box. The aspirator will do the opposite, providing fresh air and renewing the one in the box. In some cases, it is possible to do it without all these accessories, but we will have to provide that the temperature of box is lower than 22/28 ° C with the lamps on and lower than 4/5 ° C with the lamps off if we are in the growth phase.
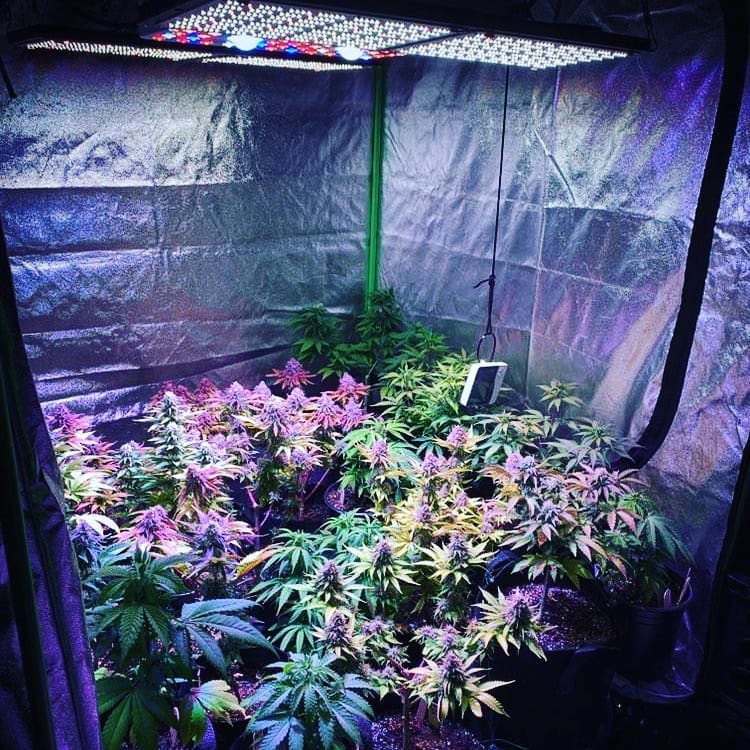
Photo from @budgetledgrowlights
On the other hand, if we are in the flowering phase, the temperatures have to vary from 20 ° C to 26 ° C with lamps switched on in the first weeks. In the last two weeks or even a week before the harvest, we can lower them between 18 ° C and 24 ° C, while with the lamps off it has to varies from 5 ° C to 10 ° C. To keep temperatures under control, better use a good thermometer.
We hope that all this information were useful and we wish all of you could start your indoor growing as soon as possible and with the results you hoped.
Non avete spazio in giardino, non volete rischiare che dei vicini impiccioni vi vedano, oppure la coltivazione indoor vi spaventa perché pensate che sia un processo complicato e costoso? Allora questo post vi aiuterà a chiarire alcuni dei vostri dubbi e ad avere un’idea un po’ più chiara al riguardo.
Per coltivazione indoor si intende quella che facciamo dentro le mura di casa e quindi più sicura da sguardi indiscreti. Questo tipo di coltivazione però ha alcuni punti essenziali che non si possono trascurare se vogliamo avere un raccolto sano ed abbondante. Andiamo a vederli.
Per coltivazione indoor si intende quella che facciamo dentro le mura di casa e quindi più sicura da sguardi indiscreti. Questo tipo di coltivazione però ha alcuni punti essenziali che non si possono trascurare se vogliamo avere un raccolto sano ed abbondante. Andiamo a vederli.
Photo from @elcultivar
La scelta di un grow box rende tutto un po più semplice perché la sua struttura è pensata rispettando l’importanza di questi fattori. In mercato si trovano diversi box di diverse altezze, larghezze e lunghezze. Noi vi consigliamo di partire con una misura di almeno 100 cm di larghezza, 100 cm di lunghezza e 200 cm di altezza. Un grow box di queste misure vi permetterá scegliere gli impianti di illuminazione e del controllo della temperatura che facciano al caso vostro; inoltre potremmo disporre di una vasta serie di accessori per poter avere sempre una buona coltivazione, nonostante le diverse condizioni climatiche che le stagioni ci regalano.
La scelta di un grow box rende tutto un po più semplice perché la sua struttura è pensata rispettando l’importanza di questi fattori. In mercato si trovano diversi box di diverse altezze, larghezze e lunghezze. Noi vi consigliamo di partire con una misura di almeno 100 cm di larghezza, 100 cm di lunghezza e 200 cm di altezza. Un grow box di queste misure vi permetterá scegliere gli impianti di illuminazione e del controllo della temperatura che facciano al caso vostro; inoltre potremmo disporre di una vasta serie di accessori per poter avere sempre una buona coltivazione, nonostante le diverse condizioni climatiche che le stagioni ci regalano.
Ora, dato che nel mercato troverete diversi tipi di lampade e la cosa potrebbe confondervi, vediamo di distinguere le diverse scelte. Durante la prima fase della nostra pianta, ossia la crescita, avremo bisogno di una lampada bianca o azzurra che ci dia 6 ore di oscurità e ben d18 ore di luce. Per questa fase possiamo utilizzare sistemi HM, CFL, LED o Fluorescenti.
Per la fioritura invece, useremo una lampada arancione o rossa, e dovremo alternare 12 ore di luce a 12 ore di oscurità. I sistemi più usati per questa fase sono: HPS, HPS+HM e LED. Nel caso in cui abbiate scelto delle piante autofiorenti, le ore di luce aumentano a 20 mentre quelle di buio saranno solo 4. Usando una luce bianca durante la crescita e una arancione dall’inizio della fioritura al raccolto.
Photo from @budgetledgrowlights
Abbiamo già il nostro box e l’illuminazione corretta, ma senza una ventilazione adeguata, la proliferazione di diversi insetti e muffe sará il nostro prossimo problema. Per evitare questo sgradevole inconveniente, dovremo fornirci di tre essenziali accessori: un ventilatore interno, un estrattore d’aria e un aspiratore. Un semplice ventilatore dentro al box muoverà l’aria al suo interno permettendoci di mantenere la giusta temperatura. L’estrattore d’aria, come dice il proprio nome, estrarrà il caldo accumulato nel box, riducendo l’umidità e il calore e aiutando il riflusso dell’aria stessa.
L’aspiratore farà il contrario, fornendo aria fresca e dunque rinnovando quella nel box. In alcuni casi si può fare a meno di questo accessorio, sempre che la temperatura all’interno del box sia inferiore ai 22/28°C con le lampade accese, e ai 4/5°C con lampade spente se siamo nella fase di crescita. Se siamo invece nella fase di fioritura, le temperature dovranno oscillare tra i 20°C e i 26°C con le lampade accese nelle prime settimane. Nelle ultime due settimane o addirittura una settimana prima del raccolto, possiamo abbassarle tra i 18°C e i 24°C, mentre con le lampade spente varia dai 5°C ai 10°C. Per tenere sotto controllo le temperature, è consigliato ricorrere ad un buon termometro.
Speriamo che tutte queste informazioni vi siano state utili e vi auguriamo di cominciare il piú presto la vostra coltivazione indoor con i risultati sperati.
¿No tenéis espacio en el jardín? ¿No queréis arriesgaros a que los vecinos torpes os vean? ¿El cultivo interior os asusta porque pensáis que es un proceso complicado y caro? Entonces, esta publicación os ayudará a aclarar algunas de sus dudas y a tener una idea un poco más clara al respeto.
Cultivo interior es el que hacemos dentro de las paredes de la casa y, por lo tanto, es más seguro de las miradas indiscretas. Sin embargo, este tipo de cultivo tiene algunos puntos esenciales que no podemos pasar por alto si queremos tener una cosecha saludable y abundante. Vamos a verlos.
Lo primero que tenemos que elegir con cuidado es la sala de cultivo, que es la sala donde guardaremos nuestras plantas. Puede ser fácilmente una habitación interior de la casa, una esquina del sótano, un armario o una caja de cultivo. La elección depende de vosotros. Sin embargo, si elegimos una de las primeras opciones, debemos tener cuidado de que la iluminación, el tamaño de la habitación y la ventilación sean correctos (veremos estos puntos un poco más adelante).
Photo from @elcultivar
De alguna manera, cabe aclarar que la elección de una caja de cultivo, hace que todo sea un poco más fácil, puesto que su estructura está pensada al respeto de estos factores importantes. En el mercado hay varias cajas de diferentes tamaños. Nosotros os recomendamos intentar con una medida de por lo menos 100 cm de ancho, 100 cm de largo y 200 cm de alto. Una caja de cultivo con estas medidas os permitirá elegir el sistema de iluminación y de control de temperatura que más os interesan; también podríamos tener una amplia gama de accesorios para tener siempre un buen cultivo, a pesar de las diferentes condiciones climáticas que nos dan las temporadas.
Una vez que se ha elegido la sala de cultivo, podemos dedicarnos a la búsqueda de la iluminación correcta. Diferentemente del cultivo al aire libre, donde la luz es proporcionada por el sol, en este caso necesitaremos lámparas adecuadas. El primer punto a aclarar sobre este asunto es que no es el accesorio para ahorrar, ya que es lo más importante para dar vida a una cosecha abundante.
Y dado que en el mercado encontrará diferentes tipos de lámparas y esto podría confundirlo, vamos a distinguir las diferentes opciones. Para la primera fase de nuestra planta, es decir el crecimiento, necesitaremos una lámpara blanca o azul que nos dé 6 horas de oscuridad y 18 horas de luz. Para esta fase podemos usar sistemas HM, CFL, LED o fluorescentes. Para la floración, en cambio, utilizaremos una lámpara naranja o roja, y tendremos que alternar 12 horas de luz con 12 horas de oscuridad.
Los sistemas más utilizados para esta fase son: HPS, HPS + HM y LED. Si habéis elegido plantas auto florecientes, las horas de luz aumentan a 20 mientras que las horas oscuras serán 4. Usando luz blanca durante el crecimiento y una luz naranja desde el comienzo de la floración hasta la cosecha.
Ya tenemos nuestra sala de cultivo y la iluminación correcta, pero sin una ventilación adecuada, la proliferación de diferentes insectos y mohos será nuestro próximo problema. Para evitar esta desagradable situación, debemos proporcionarnos tres accesorios esenciales: un ventilador interno, un extractor de aire y un aspirador. Un simple ventilador dentro de la caja moverá el aire en su interior permitiendo el mantenimiento de la temperatura correcta.
El extractor, como su nombre lo indica, extraerá el calor acumulado en la caja, reduciendo la humedad y ayudando el reflujo del aire mismo. El aspirador hará lo contrario, proporcionará aire fresco y lo renovará en la caja. En algunos casos, se puede prescindir de este accesorio, siempre que la temperatura de la habitación o de la caja sea inferior a los 22/28 ° C con las lámparas encendidas y a los 4/5 ° C con las lámparas apagadas si estamos en la fase de crecimiento. Si, por otro lado, estamos en la fase de floración, las temperaturas tendrán que variar entre los 20 ° C y los 26 ° C con las lámparas encendidas durante las primeras semanas.
Photo from @budgetledgrowlights
En las últimas dos semanas o incluso una semana antes de la cosecha, podemos reducirlas entre los 18 ° C y los 24 ° C, mientras que, con las lámparas apagadas, puede variar entre los 5 ° C y los 10 ° C. Para mantener las temperaturas bajo control, está aconsejado usar un buen termómetro.
Esperamos que todas estas informaciones os puedan ser útiles y os auguramos empezar lo más pronto posible con vuestro cultivo interior con los resultados esperados.